Gareth's Robinhood 2B Site
MENU
The Donor
Stripping Donor
The Collection
The Build Diary
Links
Modifications
Hoodies
Home
ADVERTS
| June |
July |
August |
September |
October |
|
15th and 16th February
Well the lack of enthusiasm of the last month has been reduced slightly by this weekend. At this point I would like to add my thanks to a couple of guys who e-mailed me in response to my 31 January entry:
Steve Young from
Eastleigh who is currently in the middle of his 2B build;
David Cairncross from Cardiff who is collecting his Sub K at the end of
this month.
David said a very important thing that needs sharing:
"just think of those balmy sunny summer days with a picnic basket on the back and some suitable babe at your elbow. Its just got to be worth it - hasn't it?"
Do you know what David? - I think you're right.
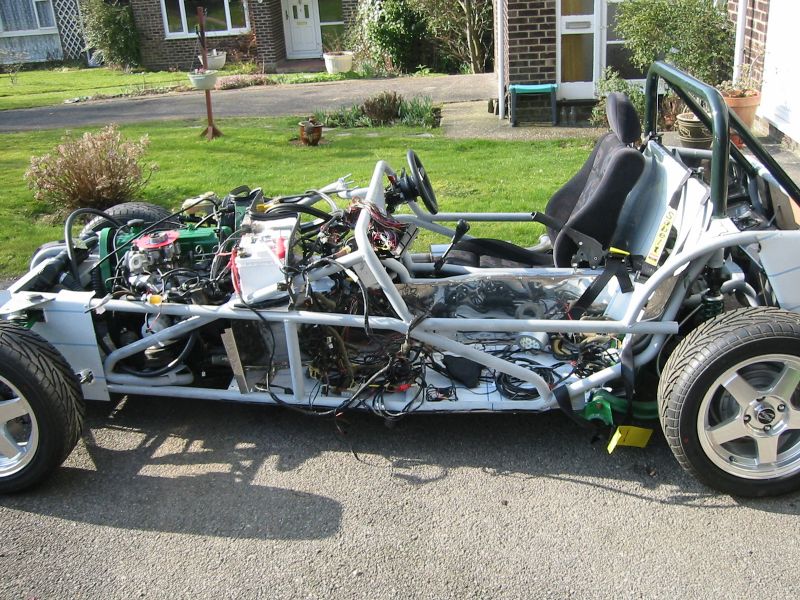
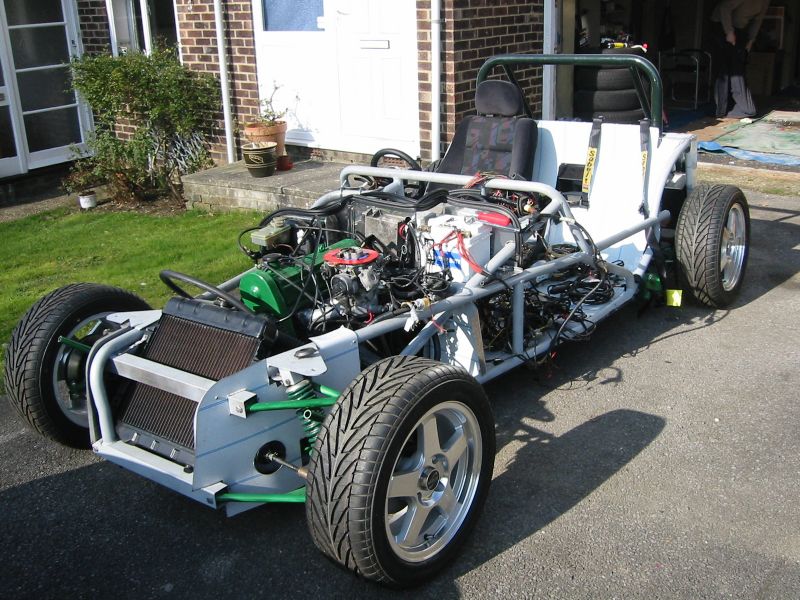
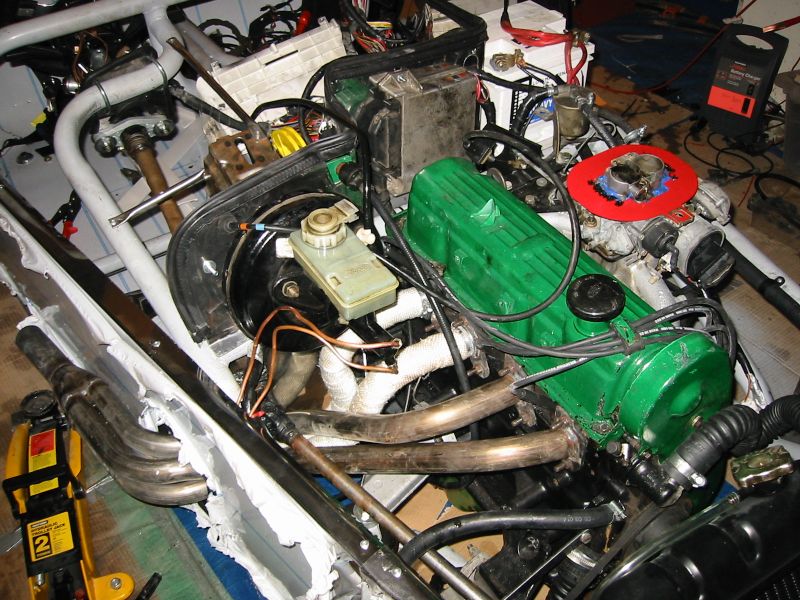
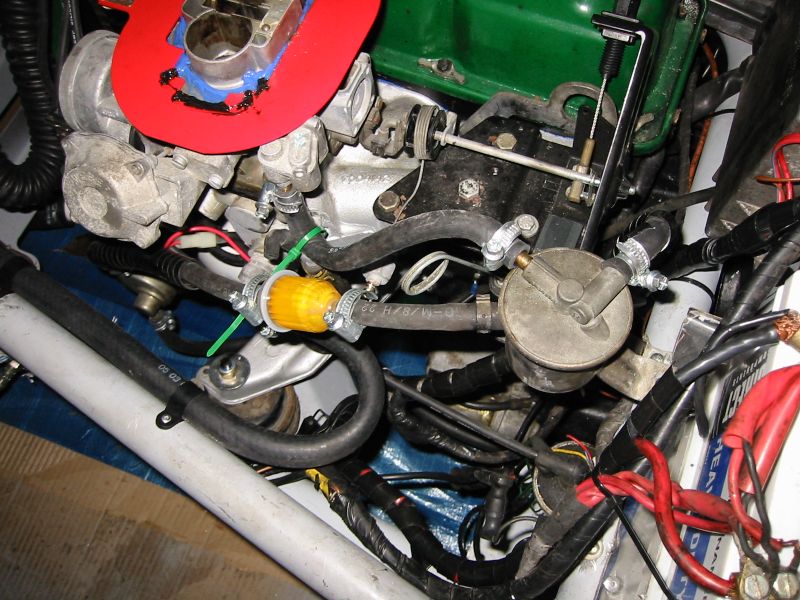
Anyway back to the build... the push towards starting the car continued this week with the fitting of all the brakes, bleeding them and filling the engine with fluids. None of this was incredibly interesting so I'll gloss over, except for one word of warning: before filling the car with oil, make sure you have put the sump plug back in....(yes I know I'm an idiot - it was late on Saturday night and I was rushing...)
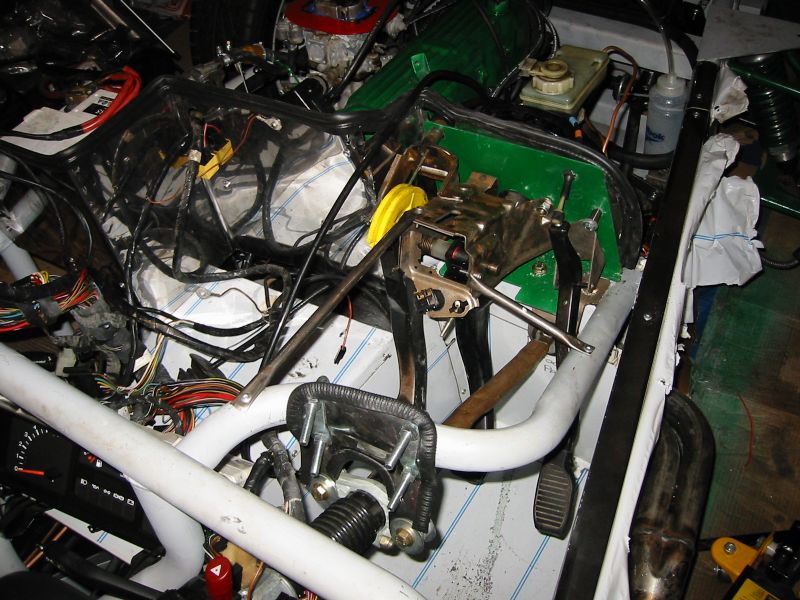
The next stage was dropping the loom into the passenger footwell and wiring and powering it up. All the wires were in place but I wasn't getting power to the ignition switch. Following the wiring diagram and making judicious use of a continuity tester, I found the one red wire I hadn't fitted to the battery terminal, fitted it and the car turned over for the first time in 5 or 6 months. It didn't fire but then I would have been surprised if it did - there were no spark plugs fitted ;-) I wanted to start by getting the car powered and turning over then check for sparks before finally adding fuel and testing for ignition.
So with the engine turning over, and a friend on his way over for the possibility of the engine starting, I moved to the ignition circuits. I fitted the spark plugs except cylinder 1 and put the HT leads on - the cylinder 1 HT lead was fitted to the spark plug and held against the engine to check for spark - and yep (you guessed it)... nothing. So I went through the first principles of car electrics and checked for power at all the key places starting at the coil and moving forwards towards the dizzy. Power was there throughout the HT side, so it was back to the electrical diagram to check the wiring for the LT side. It turns out that this was detected and managed by the ESC2 module fitted to my car, so I first checked the voltages going into the system - these were all fine, but I had made one assumption that the ESC unit itself would have been earthed by its case - wrong! So with the ignition on, I fitted the stray earth lead and I heard all the stepper motors moving to the primary position... and checking for a spark was successful!
This was the big moment: dropping a little fuel into the carb to see if I could get ignition, I turned the key and the engine tried to turn over but all the previous work had killed what little charge the battery had. However in my attempt to turn the engine over I did get a small bang and a puff of exhaust from the engine - which was promising. At this point it was 7pm and I was meant to be at a friend's house for dinner at 7:40. I made the decision to put the battery on charge and come back to it at the early part of the coming week - I cannot believe that the first try would have been successful even if I had jump-started it.
18th February
Well it's done - the bloomin' engine only started didn't it!
The work on the weekend was fine; the only thing I had wrong was the HT leads were 180 degrees out. With these swapped, and some petrol directly into the carb, the engine started.
I couldn't just leave it there, so I fitted the exhaust to give a little back pressure and took some video of the engine.
PLEASE NOTE THIS FILE IS ALMOST 2 Mb AND COULD TAKE UP TO 10 MINS TO DOWNLOAD - EITHER CLICK ON THE LINK TO VIEW IN MEDIA PLAYER OR RIGHT CLICK ON THE LINK AND CHOOSE "SAVE AS" TO DOWNLOAD
22nd February
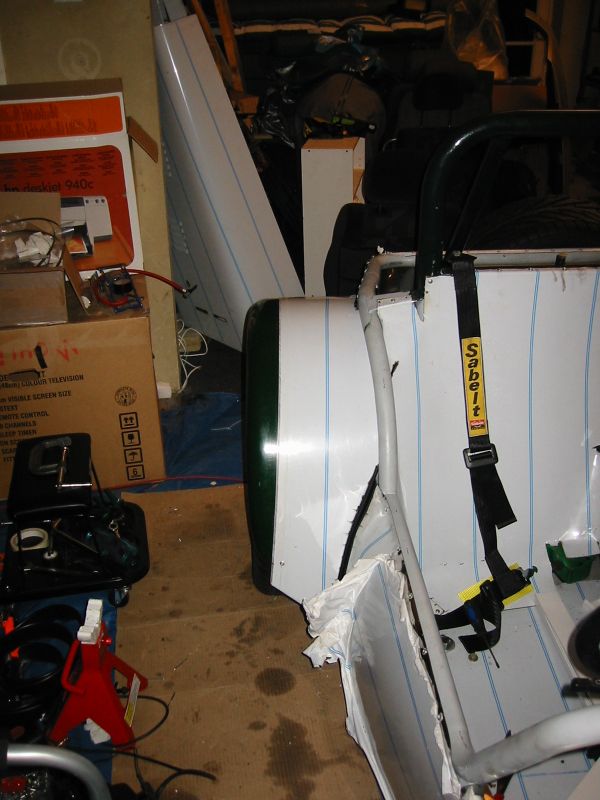
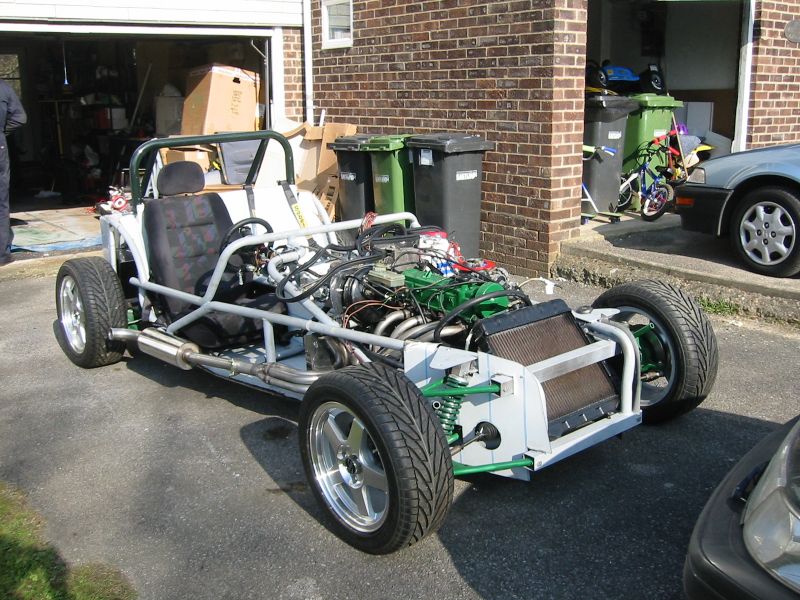
So after the excitement of the past week I decided to crack on with tidying the engine bay and fitting the driver's side panel, or at least fit it so the exhaust could be fitted in its final position.
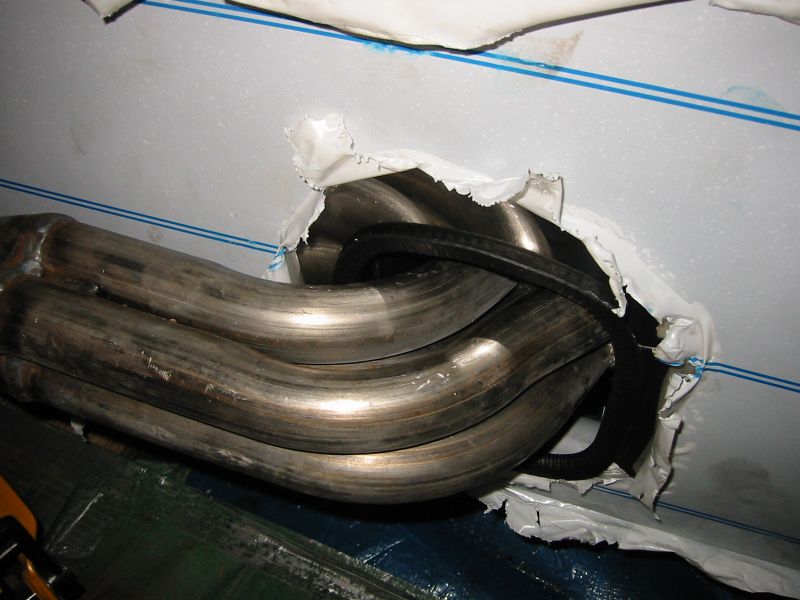
It was during this process I realised that I had made a fundemental mistake. Under no circumstances fit and fill the brake master cylinder until after you have fitted the 4 -1 exhaust manifold. I didn't, and this means that when you fit the side panel, there is no way under the sun that the exhaust will fit - it took me a slightly bent side panel and 30 minutes of swearing to realise this.
This of course meant I had to undo my work with the brakes, drain the master cylinder, undo it all and fit the exhaust - the exhaust then fits like a dream.
I did drive the car outside today and so with some gratuitous use of a digital camera, here is another momentous occasion recorded for my pleasure :)
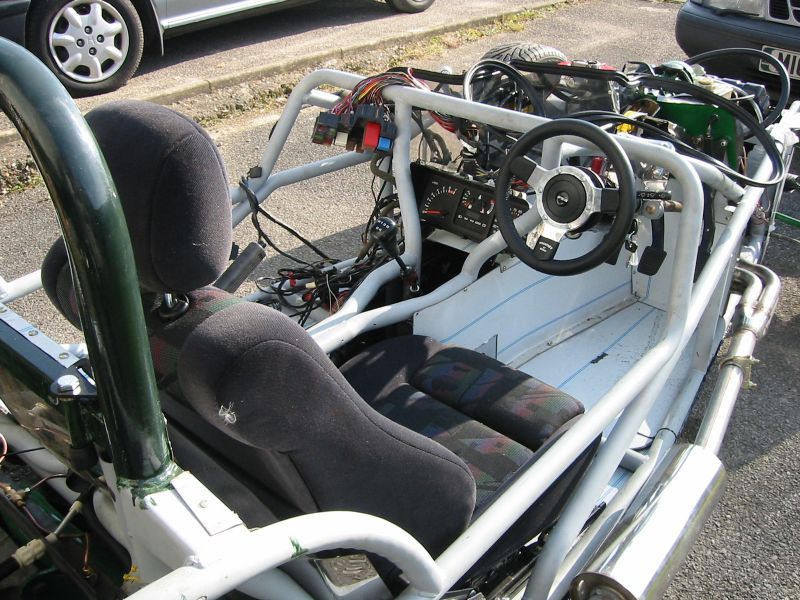
The weekend seemed to be going well so I decided to work on getting the driver's side panel fitted and the corresponding rear wheel arch in place. After watching the videos again, I was still scared of this part of the build - nothing I've done so far really impacts on the look of the car as much as the side panels and the arches.
I sat down and looked at the way the videos explained how to do it. I took note of the "problem car" and how Richard resolved the badly fitted arch. This is the order in which I tackled the two jobs:
1. Pop rivet
the front end (top edge) of the side panel.
2. Pop rivet the front end (bottom edge) of the side panel.
3. Clamp the rear part of the side panel to the chassis.
4. Fit the wheel arch to the chassis with clamps, making sure the trailing
edge is level with the rear panel bottom edge, and that the wheel is central
in the arch.
5. Loosen the clamp on the side panel, whilst holding on to it, so you
can manipulate the side panel to match the curve of the wheel arch - and
re-clamp.
6. Fit the tadpole edge trim, and pop rivet the last comb on both the
leading and trailing edges of the wheel arch.
7. Fit the remaining pop rivets to the leading edge comb, clamping and
bending the side panel to meet the arch as you go.
8. Pop rivet the rest of the side panel and the trailing edge of the arch.
Simple, aye?
Well actually it wasn't bad at all - the manipulation was a little bit of a pig, and I haven't got the wheel perfectly central, but overall I am happy with the result - I just hope I can make the other side look the same...